
In the last post I’d started the dome and in this part I finish it!
[infobox maintitle=”Want to build your own pizza oven?” subtitle=”Click here for all parts of the pizza oven build guide” bg=”yellow” color=”black” opacity=”off” space=”30″ link=”https://gardengeek.net/category/pizza-oven/”]
So here’s what it looked like where we left it last time and up until that stage the bricks went unsupported as the angle wasn’t that steep but now it gets a little tricky.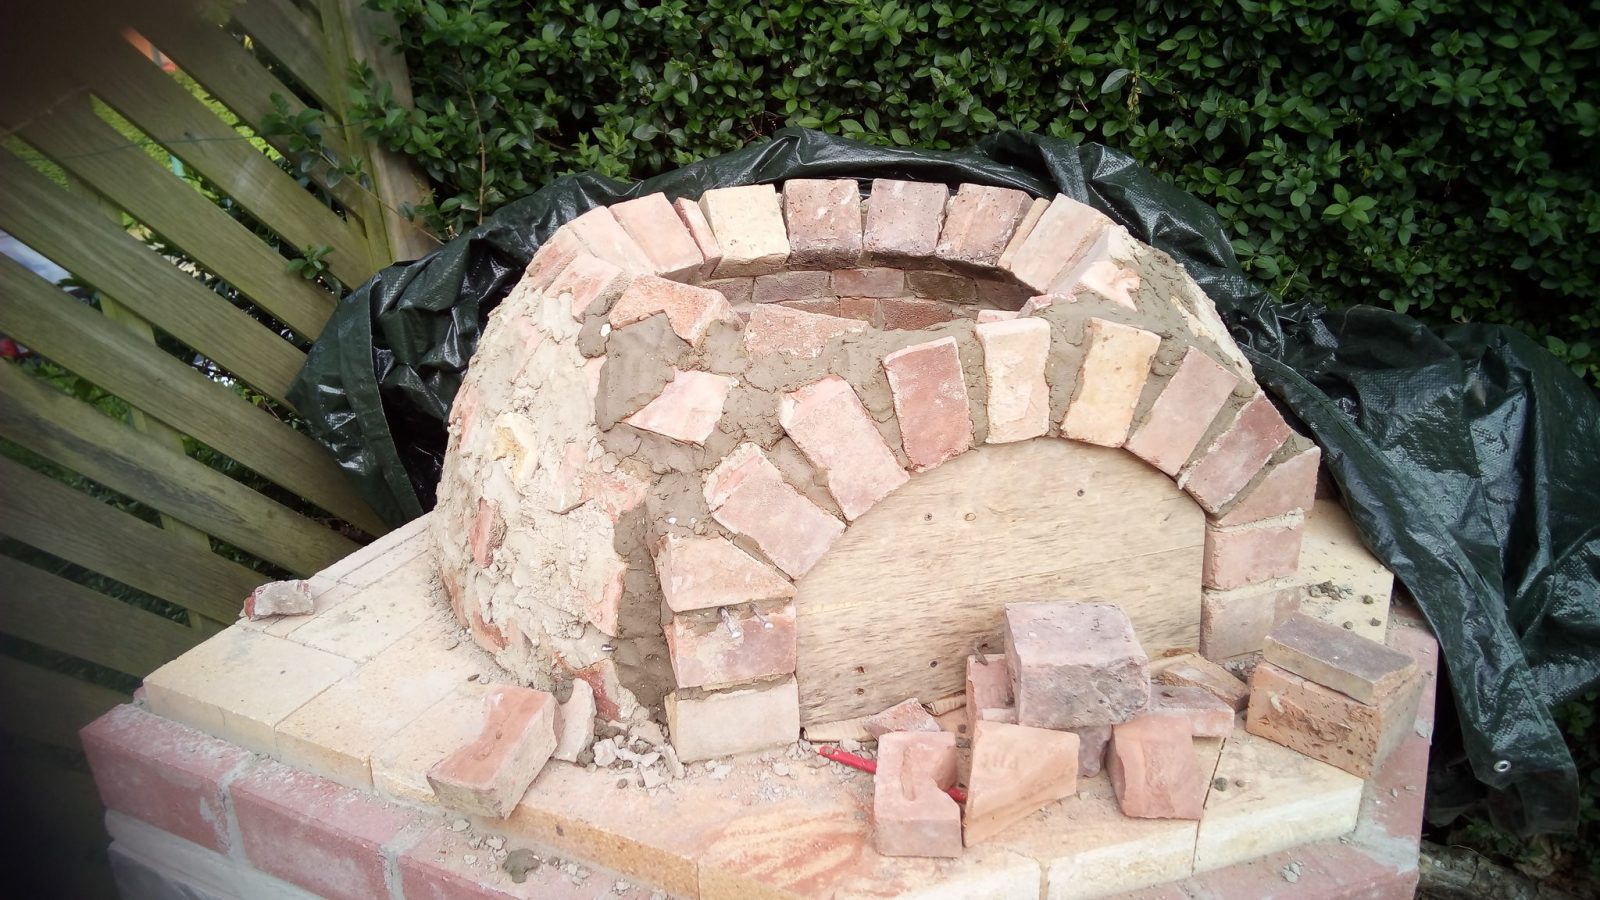
Supporting the upper dome
 When the angle becomes steep enough that the mortar won’t hold the bricks in place and gravity takes hold then you will need to find a way to support them. Some people put bricks inside, add a circle of plywood (cut in half) and then make a mound of sand.
The image on the right shows how you would go about this. Again you have to think forward as once the dome is completed you have to think about getting the wood out of the oven!
As I was only building one layer at a time I opted for a not very straightforward and slightly shoddy brick support as you can see below:

All I can say is that it worked for me! I would add that after this layer I had to cut the bricks better to fit and they actually wedged very nicely in place so once the complete row was in place it supported itself very well but using spare bricks for support worked.
When I got to the last rows I had to cut my bricks into quarters (splitting my half bricks) and then find a pattern for them to fit in together. I’m being honest in that it wasn’t the prettiest but that’s the way I work and as I was using old bricks that was always going to be the way.

If you buy a pizza oven kit then yes you’ll have a perfect dome but I’m happy with what I’ve got and I think it looks good!

Curing the oven
I now have to wait for the mortar to dry and then I’ll have to cure the oven. What is curing I hear you say to yourself. The oven will still contain water in the bricks, the mortar, etc and if we suddenly put a raging fire in there then the water would try and escape too quickly and we’d end up with cracking and ultimately an unstable build.
I want the water to be slowly baked out of the oven and I’ll do this by setting a series of five small fires over five days gradually increasing in temperature each time. Here’s a guide on how to do that.
Now you have a pizza oven!
If that’s all fine and the oven hasn’t collapsed then I’ll have a fully functioning pizza oven! Following that I plan to add the outer layer, the flue, add a layer of insulation and then render the oven!
Hello Adem
I am taking on a project of a pizza oven and found your blog excellent. I followed your brief pretty much the same. I am on the curing stage and have noticed very fine cracks in the mortar outside ,not the brick. And the oven is still solid and the inside is fine. Should I expect this or is the oven nakered . I haven’t insulated yet. There are only a few fine cracks could this be the mortar shrinking.
Thanks
Casey how did it go aventualy? Is your oven functional?
Adem
I am in finishing dome stage right now. How long did you wait u til setting the small fire inside? Last layer went today. At least we havea good weather in UK to dry it;)
Hi Mickey.
I set a small fire as soon as the mortar was properly dry and it’d had time to set naturally. I can’t remember the exact time but a small fire will be fine and I didn’t wait too long.
The weather in the UK has been hot recently so good luck with the oven build.
Hey Adem! The oven looks great! I am at this “part 6” step of my own DIY oven build and I had a question about your build. Did you get in the oven to fill the spaces between bricks with mortar? My brick rows look pretty tight until the last 3-4 and upon removing the supports I noticed several fairly large gaps that mortar did not fill. Any advice or hindsight recommendations?
Thanks!!
Hi, I am struggling to find Portland cement (all the suppliers told me that it is an ordinary cement)
Can you help please
Thank you