
After all the prep it’s finally time to start building the dome! Exciting times eh? The dome is all about bricks and mortar. I’m using bog-standard house bricks (cut in half) for my dome as my budget didn’t stretch to using fire bricks for that but research shows that it shouldn’t be too much of an issue as long as I insulate properly. I also got all my bricks for free from friends and skips!
Yes they won’t retain as much heat but I’m not going for a professional build and they should suffice. Plus I like the ‘rustic’ look 😉 I have however used firebricks for the oven floor.
[infobox maintitle=”Want to build your own pizza oven?” subtitle=”Click here for all parts of the pizza oven build guide” bg=”yellow” color=”black” opacity=”off” space=”30″ link=”https://gardengeek.net/category/pizza-oven/”]
Mortar
Normal mortar would break down under the intense heat of the oven so we need something a little stronger. You can buy high heat refractory mortar but it’s expensive and I could only find it online so it’s easier to make your own homemade version.
High Heat Mortar Recipe:
- 3 parts sharp sand (£2 for 20kg)
- 1 part portland cement (£5.50 for 25kg)
- 1 part building lime (£8.70 for 25kg)
- 1 part fireclay (£19.45 for 25kg)
You can buy the first three ingredients at your local DIY store (B&Q etc) but I bought the fireclay from eBay. A helpful tip is to mix a large amount dry and then I was able to wet mix smaller amounts whenever I needed it. This meant I could easily add some bricks to the pizza oven build after work without too much effort. Just ensure you’ve got a shed etc to keep it all dry.

Building the Dome
In the last blog I told you about the wooden forms and the indispensable tool so now it’s onto the actual building!
I’m slightly disappointed that I didn’t tie in the arch blogs better (as you can see below) so if you’re using my blog as a guide then maybe consider that, but I only realised by the time I’d gone too far to change.
It’s looking good though and as you go along you may find you need to use a smaller brick to keep the stagger on the bricks. Every layer you add strengthens the layer below so just keep going! As I’m doing this where time allows I would often just complete half a row in the evening after work, and I think this actually helped as it gave the mortar enough time to set between layers.

The Arch
Using the wooden form as a template for the arch I cut the bricks to follow the shape of the dome layers and then I cheated a little to add some extra strength to the arch as you can see below.
width=”half”]


I drilled holes though the arch bricks and then used thick nails to tie them to together. The photos above were just for guidance and then I laid them with mortar one at a time working from each side and then finishing with the centre brick.
Important Note: You’ll notice some cardboard pieces under the wooden form. These are there so that I’m able to take the form out once the arch is set. Once I take them out I’ll have some wiggle-room. If I didn’t have those then it could be a little tricky!
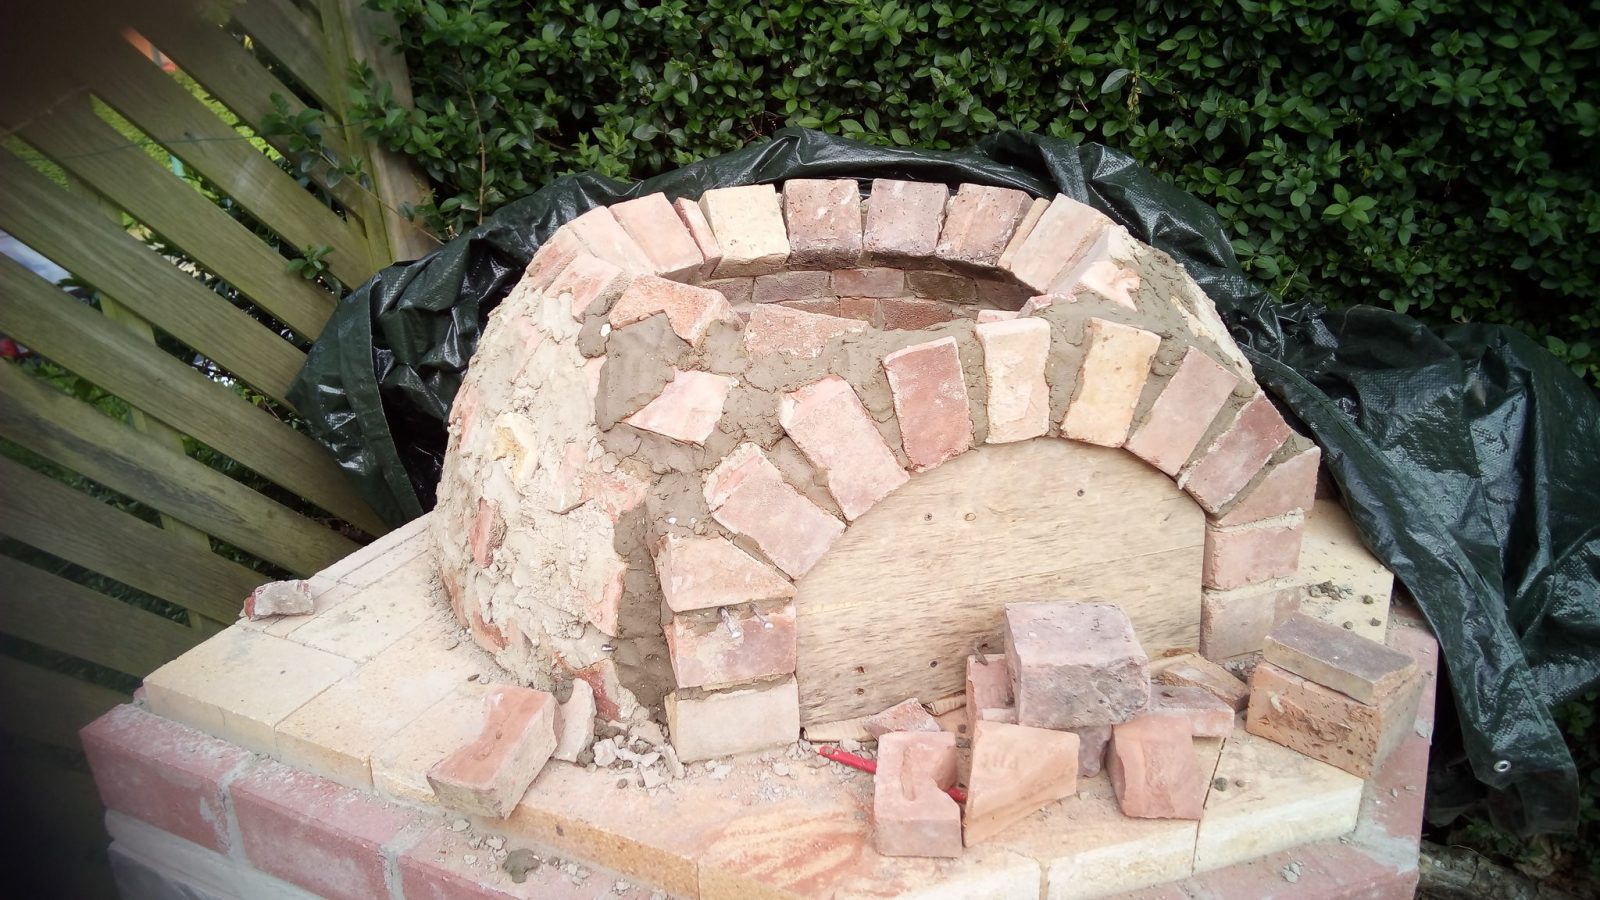
So here we are. It’s looking very much like a pizza oven I reckon! I still need to finish the dome, and the second outer arch, add the flue/chimney, insulate, and finally render. It sounds like a lot but we’re in the home-straight!
Helpful Tip: You’l also see from the photo above that I’ve got a waterproof cover for the oven. I bought this from Wilkinsons for £10 and it’s meant I’ve been able to keep everything dry whilst I’m letting the mortar cure and means I’ve got no wasted time waiting for things to dry if it’s been raining.
Hi, How many clay house bricks ( not fire bricks ) did you use for the dome . Really liked your design,..
Hi Paul. To be honest I’m not too sure! I went skip diving and got as many as I could and having a look at some of the photos I’d say I must have used between 50-70 house bricks. These were cut in half.
As I was building the oven a layer at a time it meant I could always get more bricks if I needed.
Good luck with your build.
Hi
Great blog.
I’m just planning my own version, also on a tight budget. What type of bricks did you use for the dome? Are there any that I should look for or, more importantly, avoid?
Much appreciated.
Pete
Hi Pete, Thanks. I used scavenged house bricks so just normal clay bricks you’d build a wall with. These have worked well with my oven and no cracks or anything. I avoided old bricks or ones used for block paving etc, just because I felt they wouldn’t be solid enough.
Not too helpful but bricks are pretty strong things.
Hi Adam,
Are you happy to share your drawings for this pizza oven please? About to start building one!